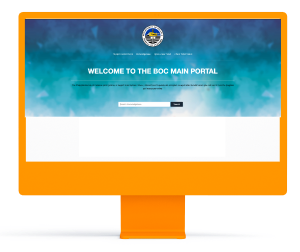
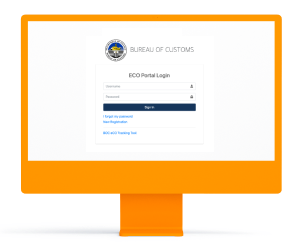
Overview of Customs Issued CO (Online)
CO Application Process for Wholly- Obtained Goods
- 1 Exporter creates an account on the BOC E-CO Portal.
- 2 Exporter to add wholly-obtained goods to E-CO portal under Wholly-Obtained Goods.
- 3 Exporter applies for E-CO on the E-CO portal.
- 4 BOC-ECD/ED reviews the application and recommends for approval.
- 5 BOC-ECD/ED approves the e-CO application.
- 6 Electronic Certificate of Origin reference number will be generated
CO Application Process For Pre-Evaluated Goods
- 1 Exporter creates an account on the BOC E-CO Portal.
- 2 Exporter submits the requirements for pre-evaluation.
- 3 BOC-ECD issued Product Evaluation Report (PER) to Exporter.
- 4 Exporter to accomplish the PEL and PER excel file template.
- 5 BOC-ECD uploads the approved pre-evaluated list on the e-CO Portal.
- 6 Exporter applies for e-CO on the e-CO Portal.
- 7 BOC-ECD/ED reviews the application and recommends for approval.
- 8 BOC-ECD/ED approves the CO application.
- 9 Electronic Certificate of Origin reference number will be generated.
Upload of Product Evaluation Reports (PER)
After the duly authorized personnel from ECD or Export Division, completes the Pre-Evaluation of Export product, they shall upload the PER and the list of Pre-Evaluated Goods (PEL) of each newly approved application to the e-CO portal.
All approved PERs shall be uploaded to the portal by the ECD or Export Division for reference by all ports Exporters that have been evaluated and or which PERs have been issued and uploaded to the portal can already apply for the issuance of e-CO.
Survey Sent
PER Application through BOC Portal
-
Step 1
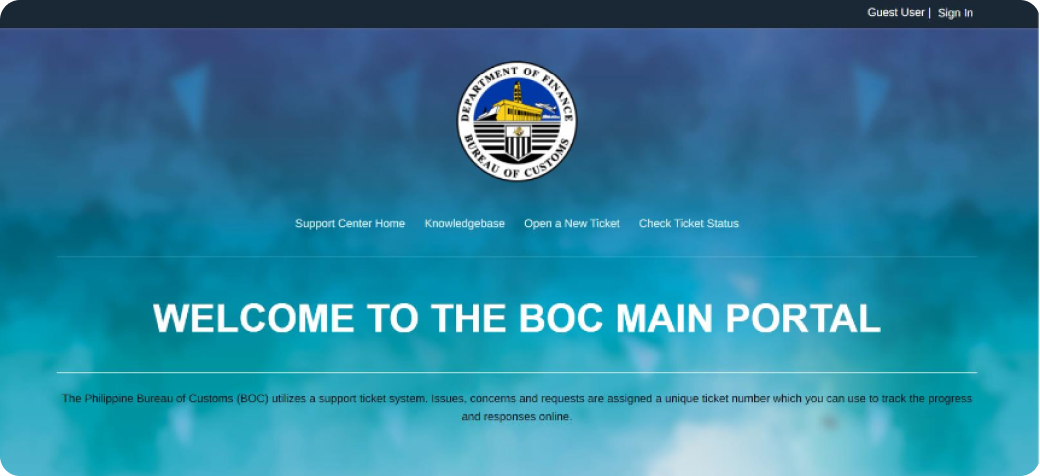 To log in to the BOC system, open the web browser and navigate to https://client.customs.gov.ph/. The user must be able to register an account.
 -
Step 2
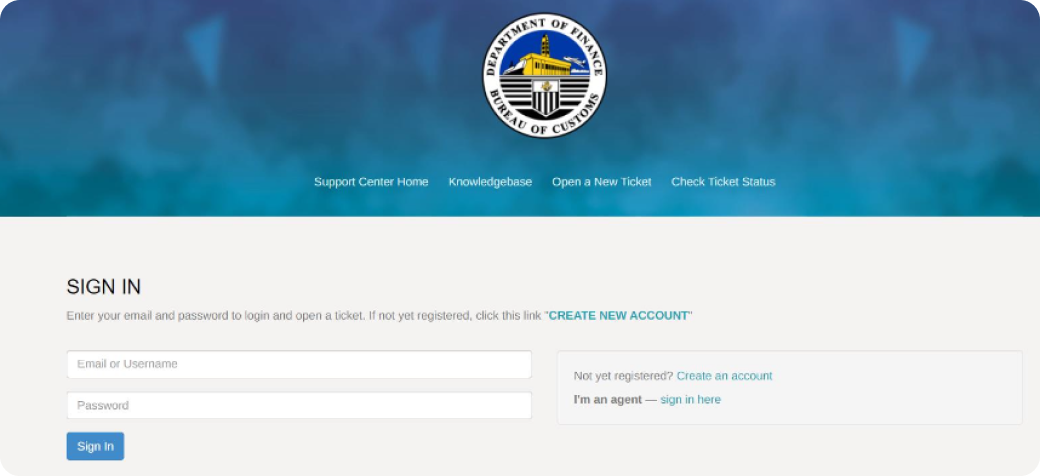
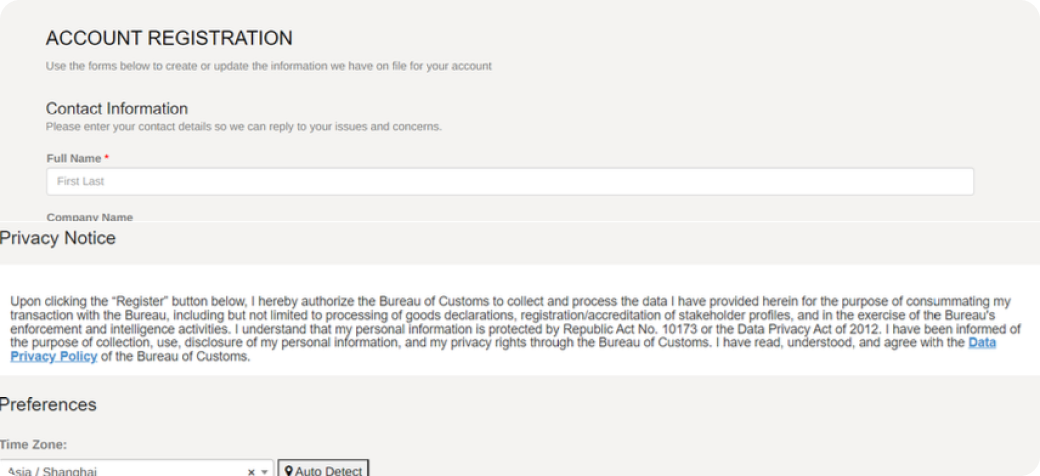 Once you click the Sign In, click the “CREATE NEW ACCOUNT” button. Fill out all the mandatory details accurately in the provided registration form. Make sure to provide all the necessary information as required. After reviewing the privacy notice, click “Register” to submit your registration and to complete the process. An email notification will be sent to the registered email address, along with the temporary password.
 -
Step 3
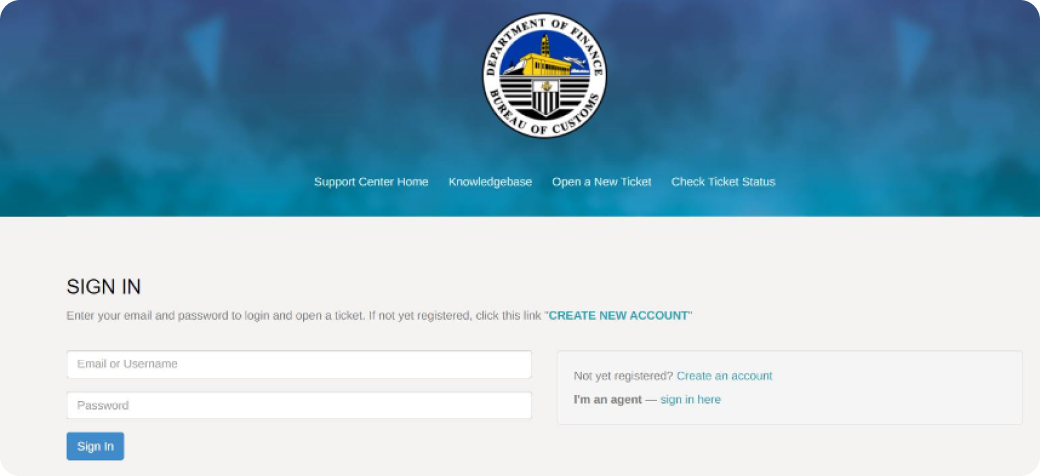 Upon successfully registering an account, log in using your email or username and password then click the “Sign In” button.
 -
Step 4
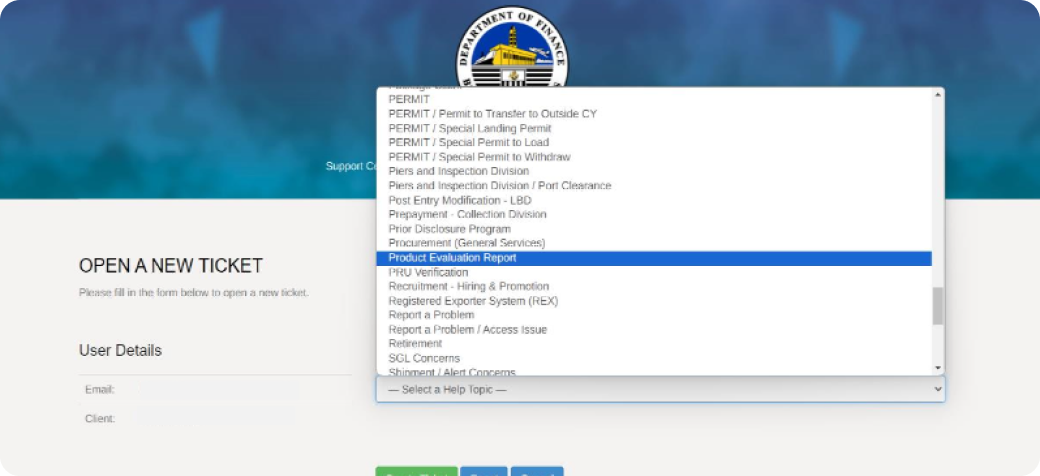 Select a Help Topic and click the Product Evaluation Report.
 -
Step 5
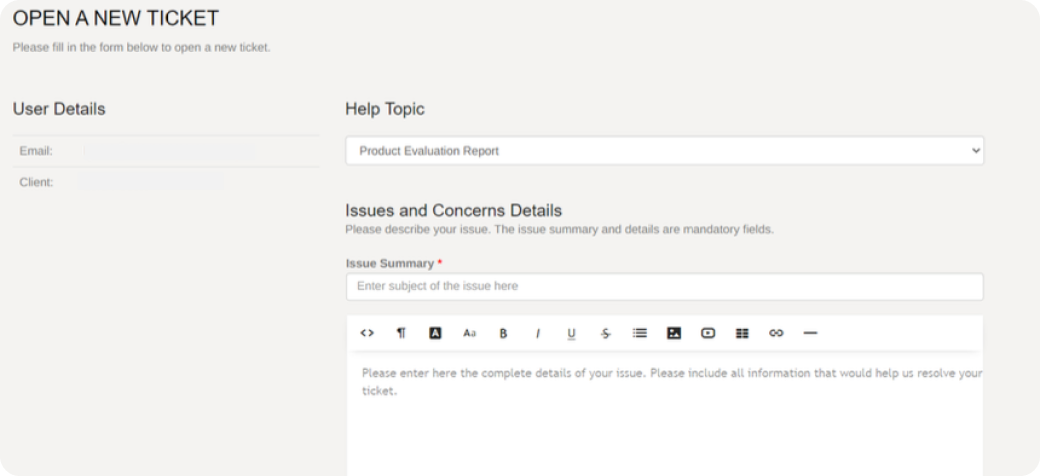 Fill out the Issues and Concern Details. Once done, attached the document requirements for the PER application and click the Create Ticket.
 -
Step 6
Monitor and check your ticket status in the BOC Portal.
BOC E-CO Exporter Manual
-
Step 1
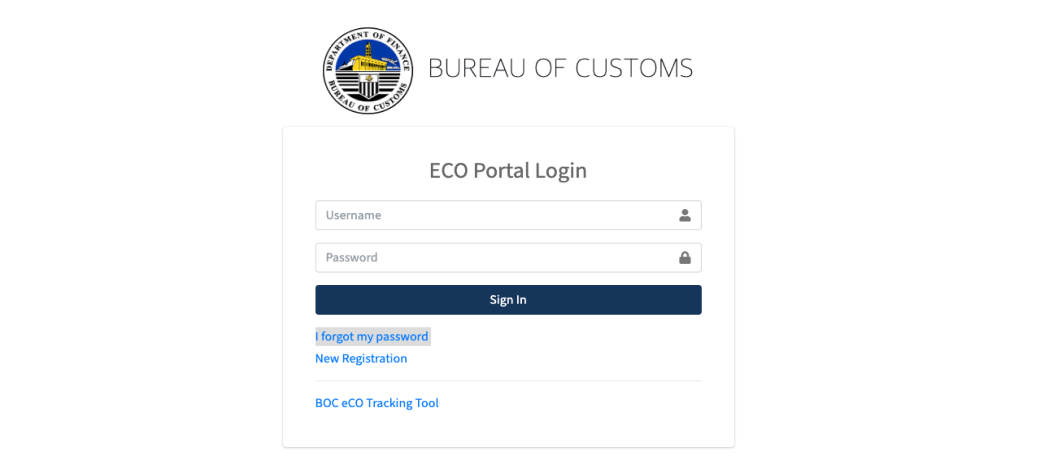 Registration
To log in to the system, open the web browser and navigate to https://eco.customs.gov.ph/login The user must be able to register an account.
-
Step 2
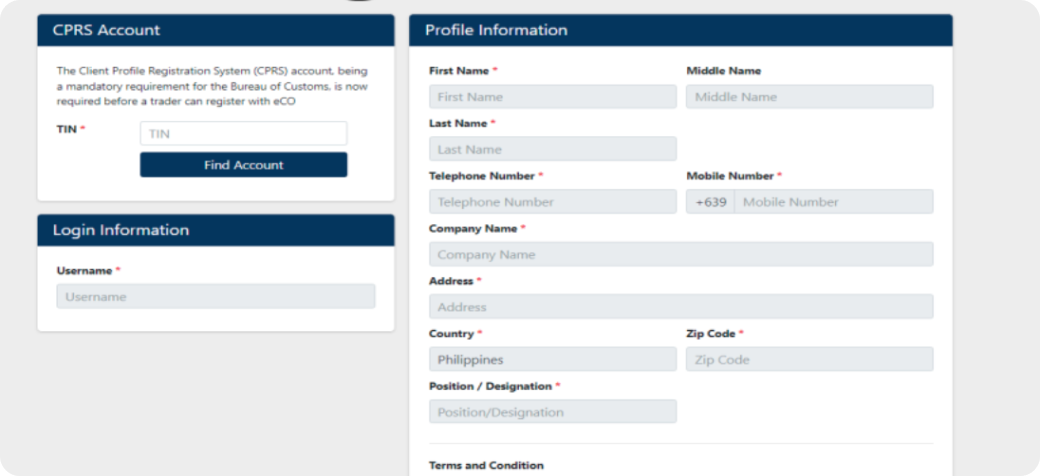 On the System, click the “New Registration” button, enter the registered TIN (Tax Identification Number) in the designated field. The system will then validate the TIN to ensure it is associated with an activated CPRS (Client Profile Registration System) as an Exporter in the BOC E2M (Electronic to Mobile) System.
Fill out all the mandatory details accurately in the provided registration form. Make sure to provide all the necessary information as required. Carefully read through the terms and conditions provided by the system before finalizing your registration. After reviewing the terms and conditions, submit your registration to complete the process.
An email notification will be sent to the registered email address in the CPRS as an Exporter, along with the temporary password.
-
Step 3
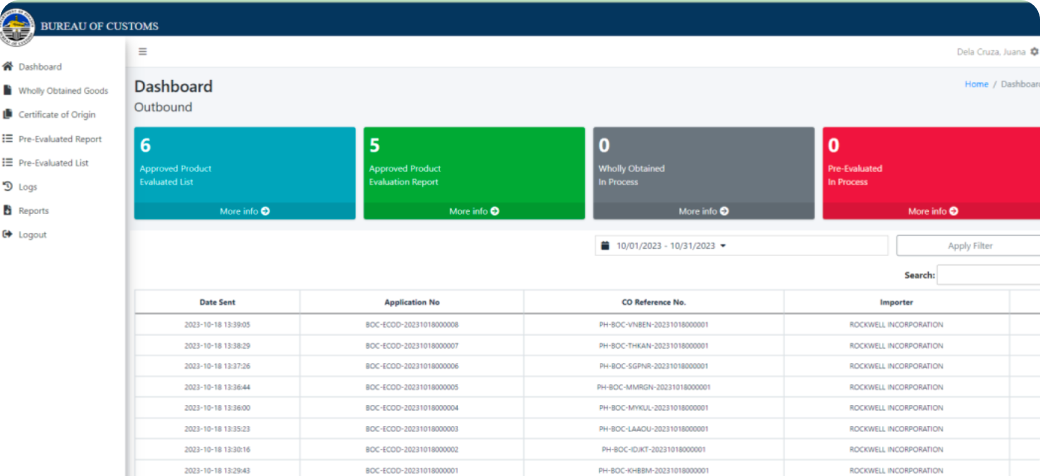 Exporter Account Dashboard
To activate your registered account, log in using your username and temporary password. Once logged in, enter your new password and confirm it to complete the account activation process.
-
Step 4
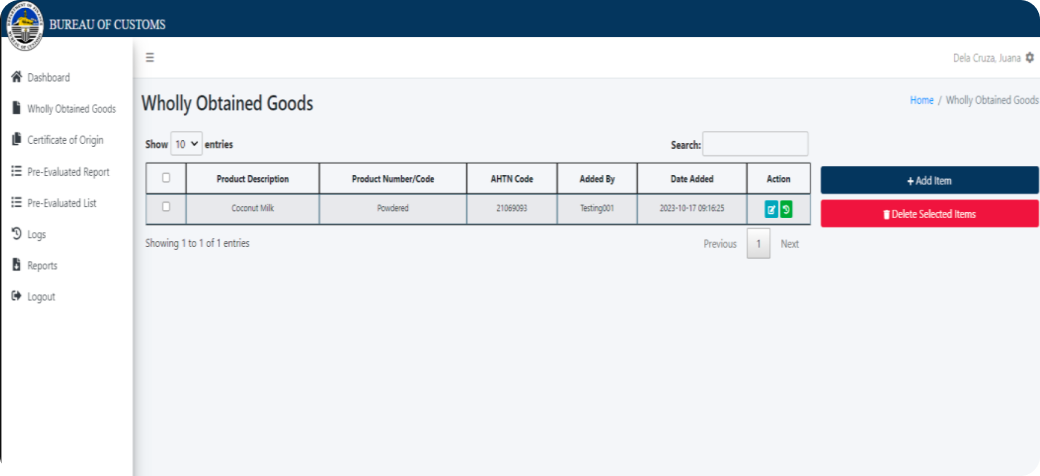 Wholly Obtained Goods Module
Upon successfully updating the password, the user will be redirected to the portal dashboard. The dashboard will display a summary of approved product evaluation report, the product evaluation list, and ongoing Certificate of Origin in processes.
-
Step 5
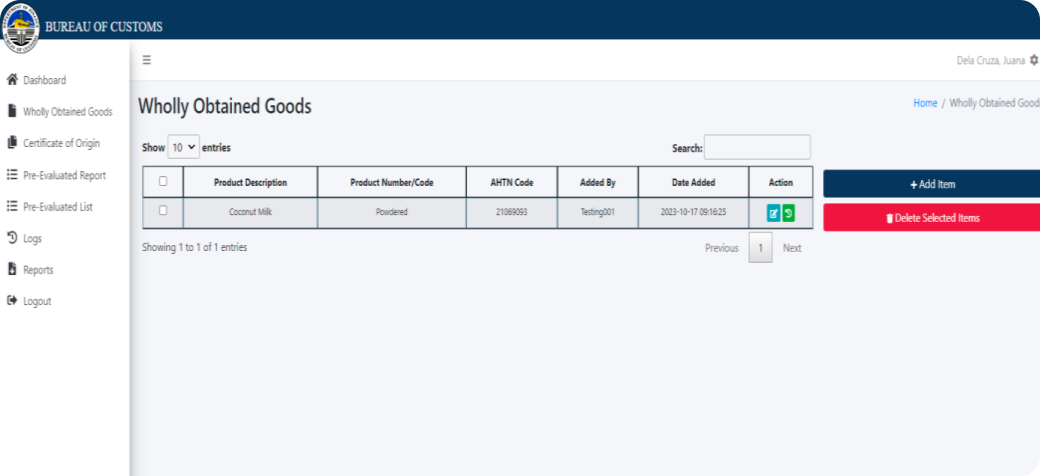
On the sidebar click the “Wholly Obtained Goods" module. The user must be able to add, delete, update and check logs of the items. The wholly obtained good refers to a product occurring naturally within a country and to a good made entirely from said product. For this type of good, origin is obviously derived from the country from which the good is obtained.
Prior to creating an e-CO application, the user must first add items falling under the 'wholly obtained' category into the system.
-
Step 6
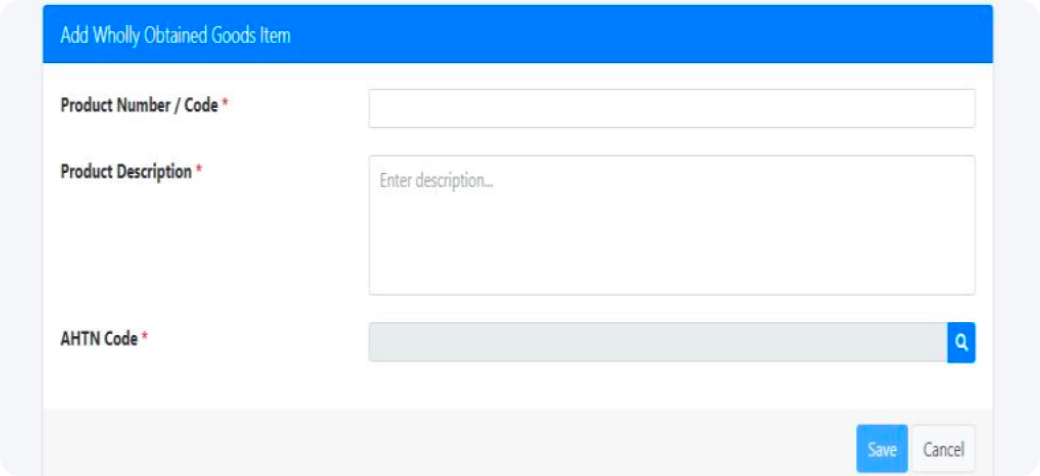
Click the 'Add Item' button and complete the required information, including the product number/code, product description, and HS Code. Then, save the item.
If the user wants to remove an item from the list added under 'Wholly Obtained Goods,' simply check the box next to the item and click the 'Delete Selected Item' button to proceed.
-
Step 7
 Certificate of Origin
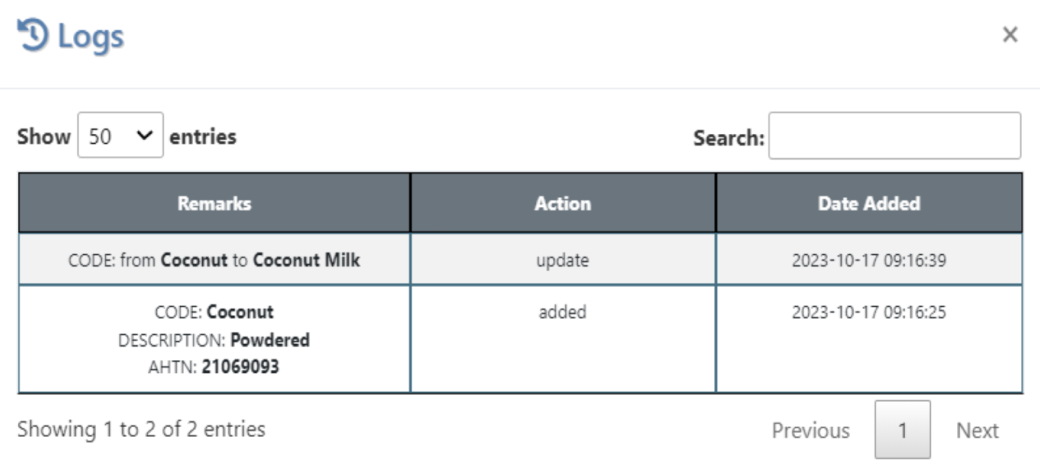
Click the 'Logs' icon to view the updates made on the specific item.
-
Step 8
Click on the 'Certificate of Origin' module to access all the applications created within the account. The user will then be redirected to the 'Certificate of Origin' dashboard, where various search parameters can be utilized.
-
Step 9
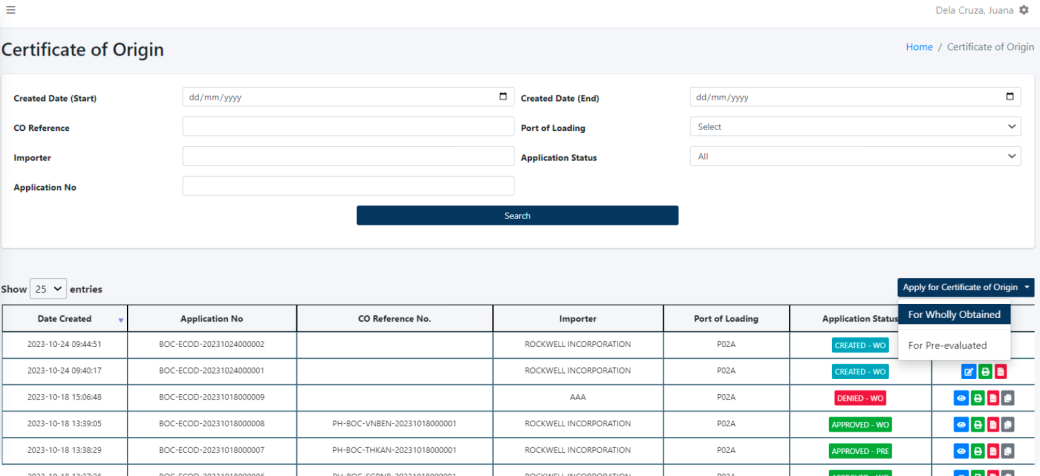 To apply for an Electronic Certificate of Origin, click on 'Apply for Certificate of Origin.' The user should be able to select either 'For Wholly Obtained' or 'For Pre-evaluated CO'.
 -
Step 9-1
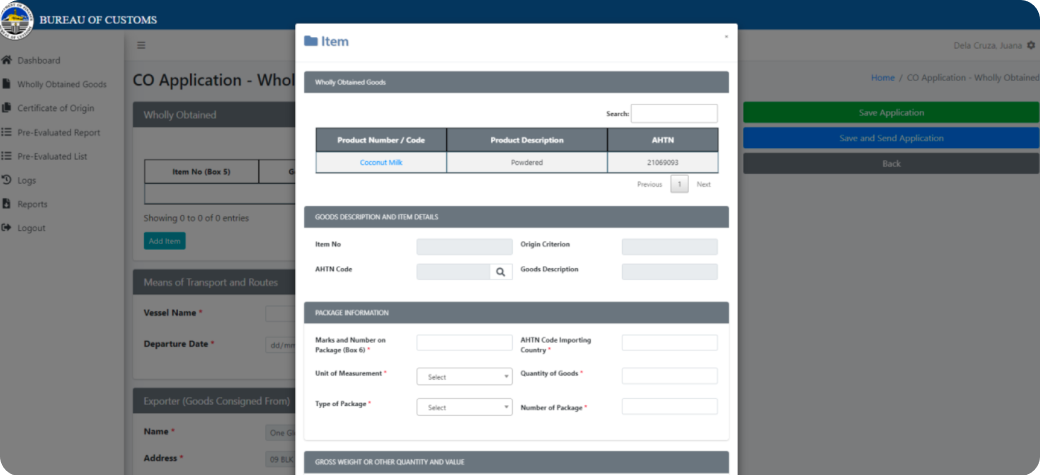 When completing the e-CO application for Wholly Obtained, ensure all required details are filled out. When adding items, please ensure that wholly obtained items are displayed. If an item is not available, the user must first add it in the Wholly Obtained module.
 -
Step 9-2
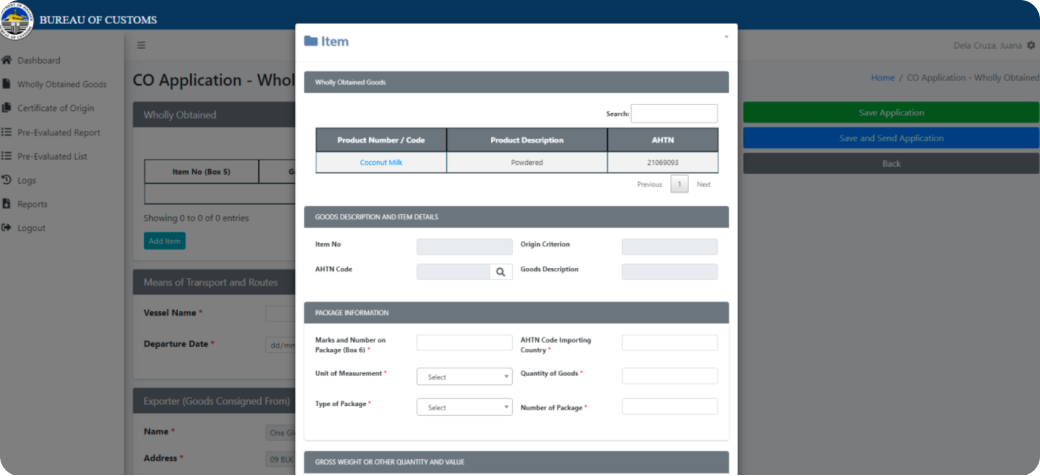
When completing the e-CO application for Pre-evaluated, ensure all required details are filled out. When adding items, ensure that pre-evaluated items are displayed. If an item is not available, the user must coordinate with the BOC using the Customer Care Portal (https://client.customs.gov.ph) to add the approved PEL (Product Evaluation List) under the account of the Exporter.
-
Step 9-3
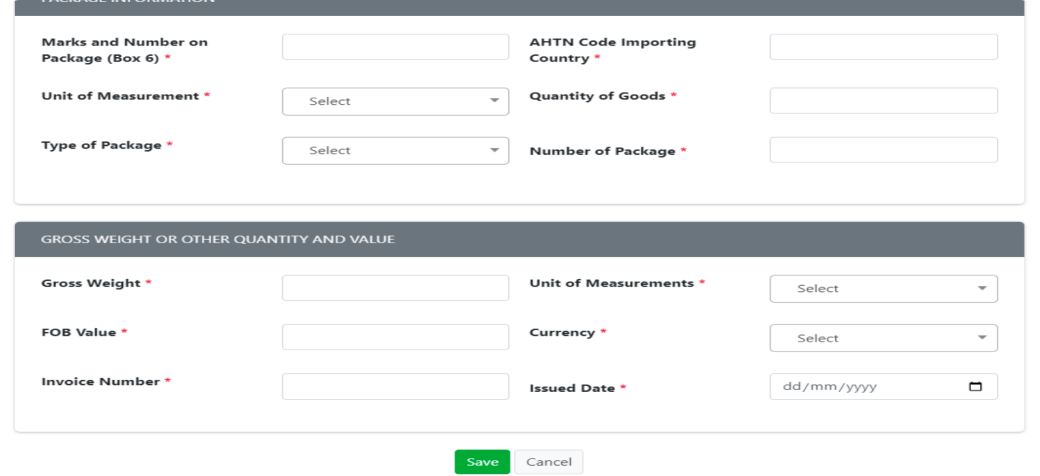 After entering the item details, the user must fill out all the mandatory fields marked with an asterisk (*) under the ‘Package Information’ and ‘Gross Weight or Other Quantity and Value’. Click the 'Save' button to proceed.
 -
Step 9-4
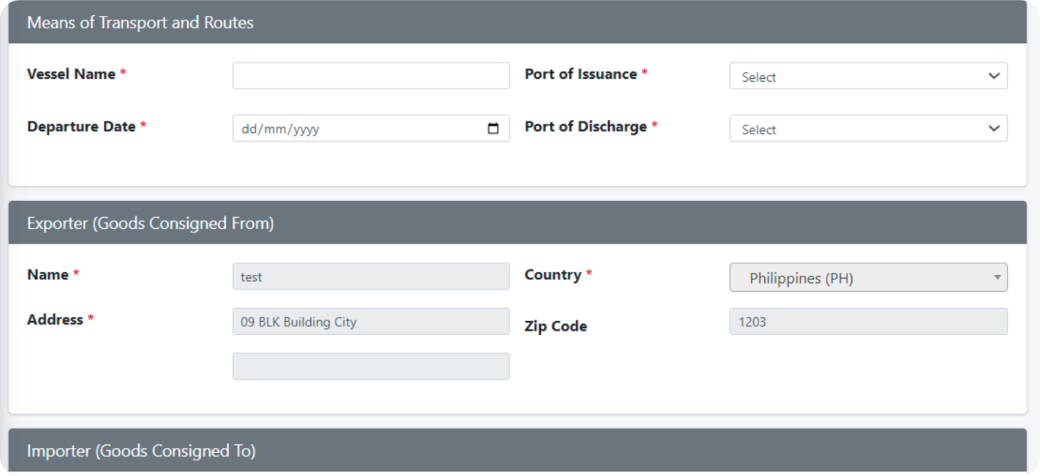
The user must also complete the 'Means of Transport and Routes', 'Exporter', and 'Importer' fields. For the Importer field, the user can use the code maintenance (Refer to Section 12 of this manual) to add commonly used Importer details to the list.
The Exporter field will be automatically populated based on the user's registration information.
-
Step 9-5
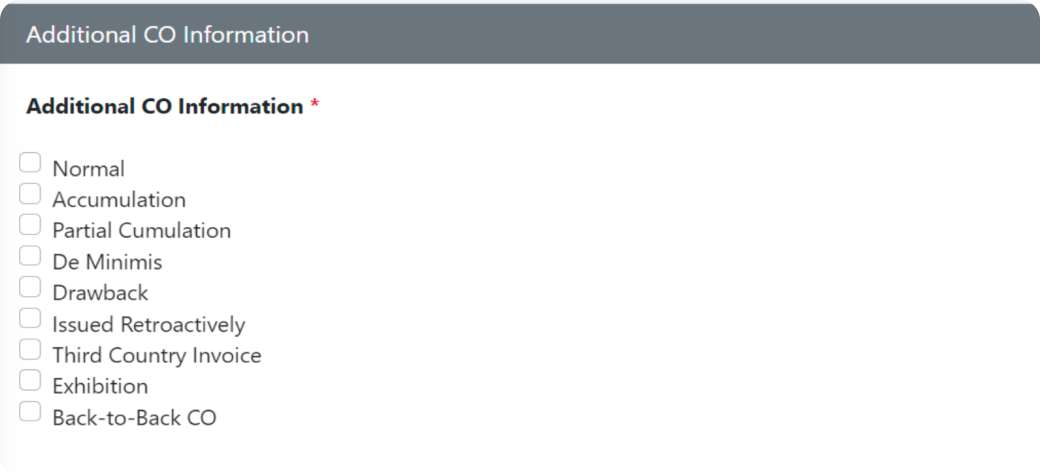 Click on the ‘Additional CO Information’ and select among the available categories for which the export goods qualify by selecting the box inside the category. The user may refer to the ‘CO Overleaf Notes’ section of the CO for the definitions and notes of available categories.
 -
Step 9-6
The user should be able to upload the following documents within the application: Export Declaration Single Administrative Document, Bill of Lading/Air Waybill, and Invoice. While the description box is not mandatory, users can utilize this field to include any remarks or notes regarding the documents.
-
Step 9-7
If all the information is completed and the mandatory fields are filled out, the user can choose to 'SAVE' or 'SAVE AND SEND' the application. All created applications can still be edited. Once submitted, an email notification will be sent to the registered email address.


